How I Tried to Add TRX to MetaMask Wallet
My first dive into cryptocurrency revealed the pitfalls that are difficult to suspect until you encounter them.
What I had at the beginning:
Why MetaMask?
- A few friends advised that this is «a simple wallet for beginners, but works only with Ethereum»;
- Googling about USDT shows that it is hosted on the Ethereum blockchain, so it should work.
But reality was not so easy, for USDT (Tether) and especially for TRX (Tronix).
Why did I decide to transfer currency from a cryptocurrency exchange into a wallet?
- Your assets in the exchange are just rows in a database (not real assets);
- Your assets in the exchange are stored in a custodial wallet, which means a third party (e.g., the exchange) has access to your account — you must be 100% confident in the reliability of the cryptocurrency exchange;
- No matter how reliable the exchange is, you never know what might come from a big regulators’ side (bans on transfers for certain citizens or disabling certain banks).
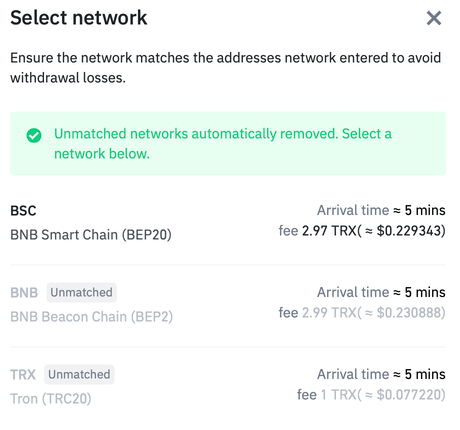
When you decide to withdraw crypto from Binance you’ll see the select «Network» where is a list of networks indicating the amount of the commission:
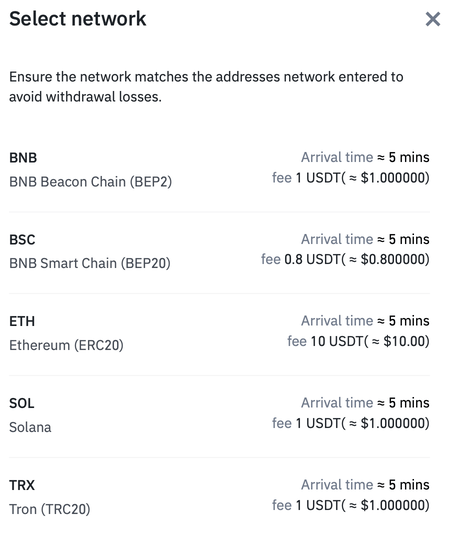
To transfer USDT by ETH (Ethereum) costs 10 USDT per transaction — it is too expensive, while transfer by TRX or BSB is around 1 USDT.
Because I already had prepared TRX tokens, it would be convenient for me to make a transaction by choosing this network (Tron). But there are no networks in MetaMask, that support transfer by BSB or TRX — only ETH by Ethereum Main Network.
After a few dozen minutes of lurking through the Internet I found out that TRON blockchain is not supported by MetaMask, but it is possible to add manually Binance Smart Chain (BSC) as a workaround.
My initial idea was to have USDT as a payment currency and TRX as a transport (a currency for transaction fees), but it failed at the start. Despite everything, I still decided to check how to transfer TRX tokens through BSC to MetaMask.
1. Add BSC (BEP20) Network to MetaMask
There is detailed instruction on how to add Binance Smart Chain to MetaMask in a browser extension. If you have the app (as I did), it is almost the same:
1. Go to: Settings > Networks > [Add Network]
2. Fill out the form for «New RPC Network»:
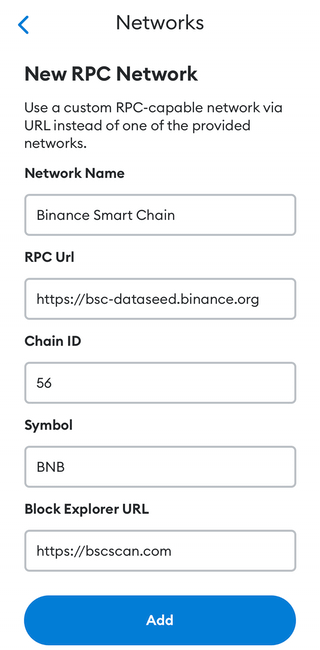
- Network Name (can be arbitrary): Binance Smart Chain
- RPC Url: https://bsc-dataseed.binance.org
- ChainID: 56
- Symbol: BNB
- Block Explorer URL: https://bscscan.com
3. [Add] new network;
4. Tap on the «Wallet» and choose network: Binance Smart Chain.
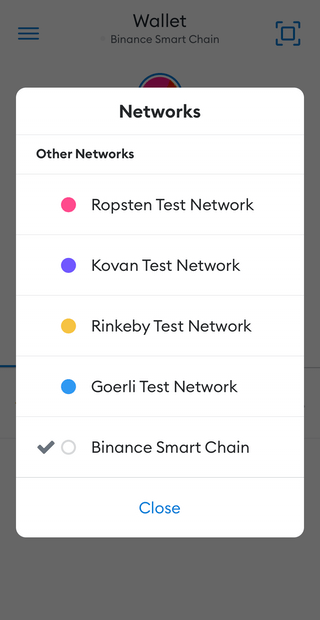
Now you are able to test receiving tokens through this network.
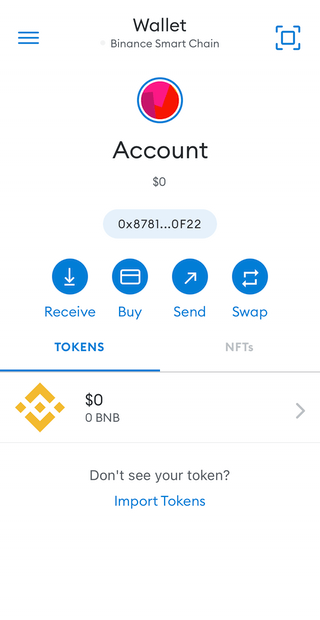
2. Add TRX tokens to MetaMask
Before transferring the real TRX tokens, you need to add these kinds of tokens to MetaMask:
- Select [Import Tokens] in your account;
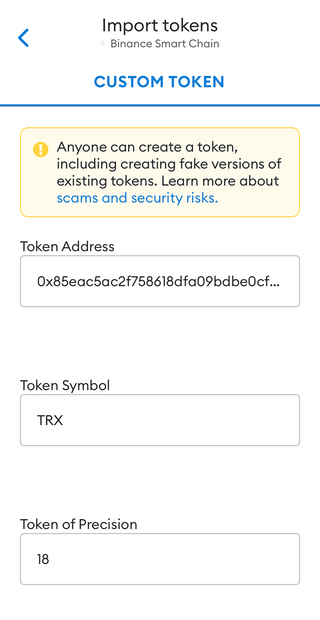
- Fill out the form for «Custom Token»:
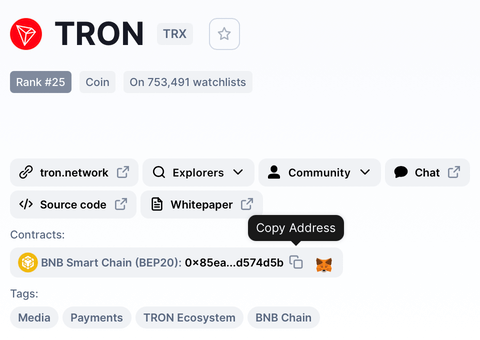
- Token Address: contract address can be obtained from the CoinMarketCap:
- Token Symbol and Token of Precision will automatically be filled in:
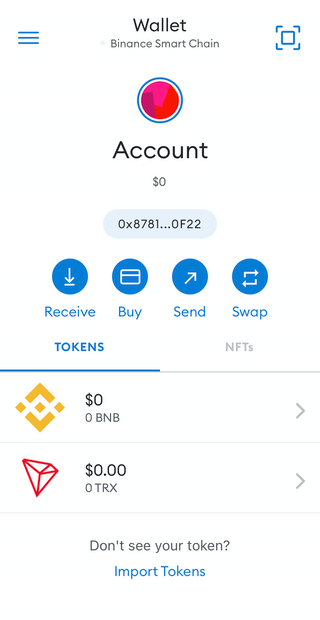
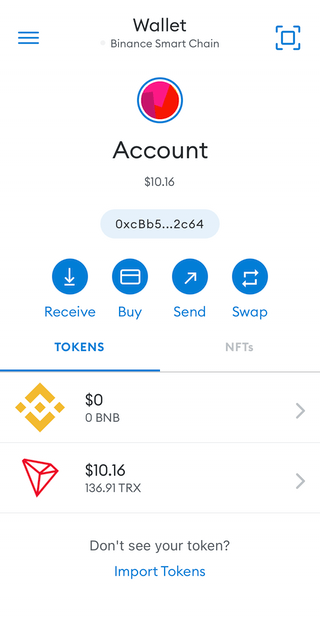
After import, you will get TRX token in your wallet:
3. Withdraw TRX tokens from Binance to MetaMask
The last step is to withdraw TRX from Binance to MetaMask wallet:
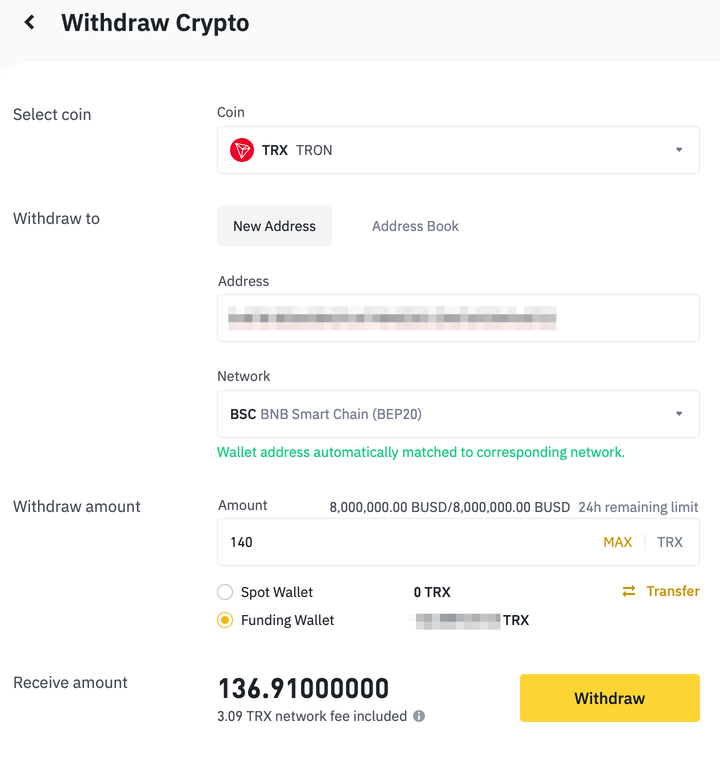
- Address: your MetaMask’s public address;
- Network: BSC — it will be the only choice because other networks will be removed if they are unmatched with your address:
After withdrawing, you will get your TRX tokens into your wallet in less than a few minutes:
USDT tokens could be transferred in the same way (by BSC network).
And one more thing (pitfall)…
I immediately decided to check how transferable TRX tokens from MetaMask to another wallet: inside the wallet, I selected TRX > Send, and on the «Sent to» screen, I saw that there is only one type of tokens to transfer — BNB — default token for BSC network:
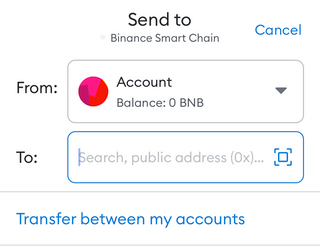
At least, you can add TRX tokens to MetaMask, but for sending them from MetaMask, you have to convert (swap) them to other tokens. And for swapping, you will need more tokens for the fees.
Then I thought that maybe the functionality in the application is limited and there are more options in the browser extension. I chose Firefox’s extension, imported my existing account, and saw 0 TRX tokens. It turns out that to connect the app and the extension, you had to make a «Sync with mobile», but it does not work:
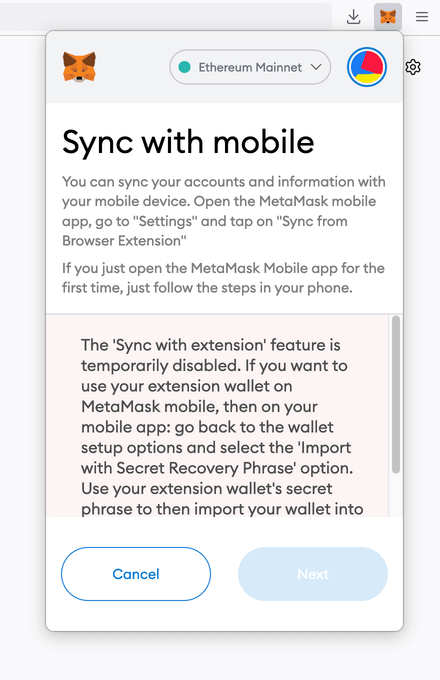
Mobile Sync is disabled in MetaMask
So, your MetaMask wallet is rigidly tied to the app on the phone (or to the extension in the browser).
Summary:
- If you are a noobie in crypto, be prepared for the unexpected WTFs;
- If your friend says that it is easy, be prepared that it is not;
- Maybe you should choose another crypto wallet (Exodus or Trust Wallet works with TRX «out of the box»), then you would not have faced all these difficulties.
But I learned a lot:
- MetaMask works only with EVM-compatible blockchains (Ethereum Virtual Machine) — Ethereum for ETH tokens by default;
- Other networks could be manually added to MetaMask. But only certain: Binance Smart Chain for BNB tokens, Polygon for MATIC tokens and Avalanche for AVAX tokens);
- Despite TRON is based on Ethereum’s code, it runs on its own TVM network (Tron Virtual Machine) and therefore is not supported by MetaMask;
- Custom non-EVM tokens can still be added to MetaMask;
- But for further operations with non-EVM tokens in MetaMask, they must be swapped into supported tokens — default tokens of the chosen network (e.g., BNB for BSC);
- To transfer USDT to MetaMask it is easy (and cheaper) to use BNB as a currency for transaction fees;
- More lore through Ethereum’s community guides and resources.
Copy @ Medium