Browser Console for Functional Testing
As a test engineer, you have to use DevTools for efficient testing of UI and frontend, and the browser’s Console is an essential part of it.
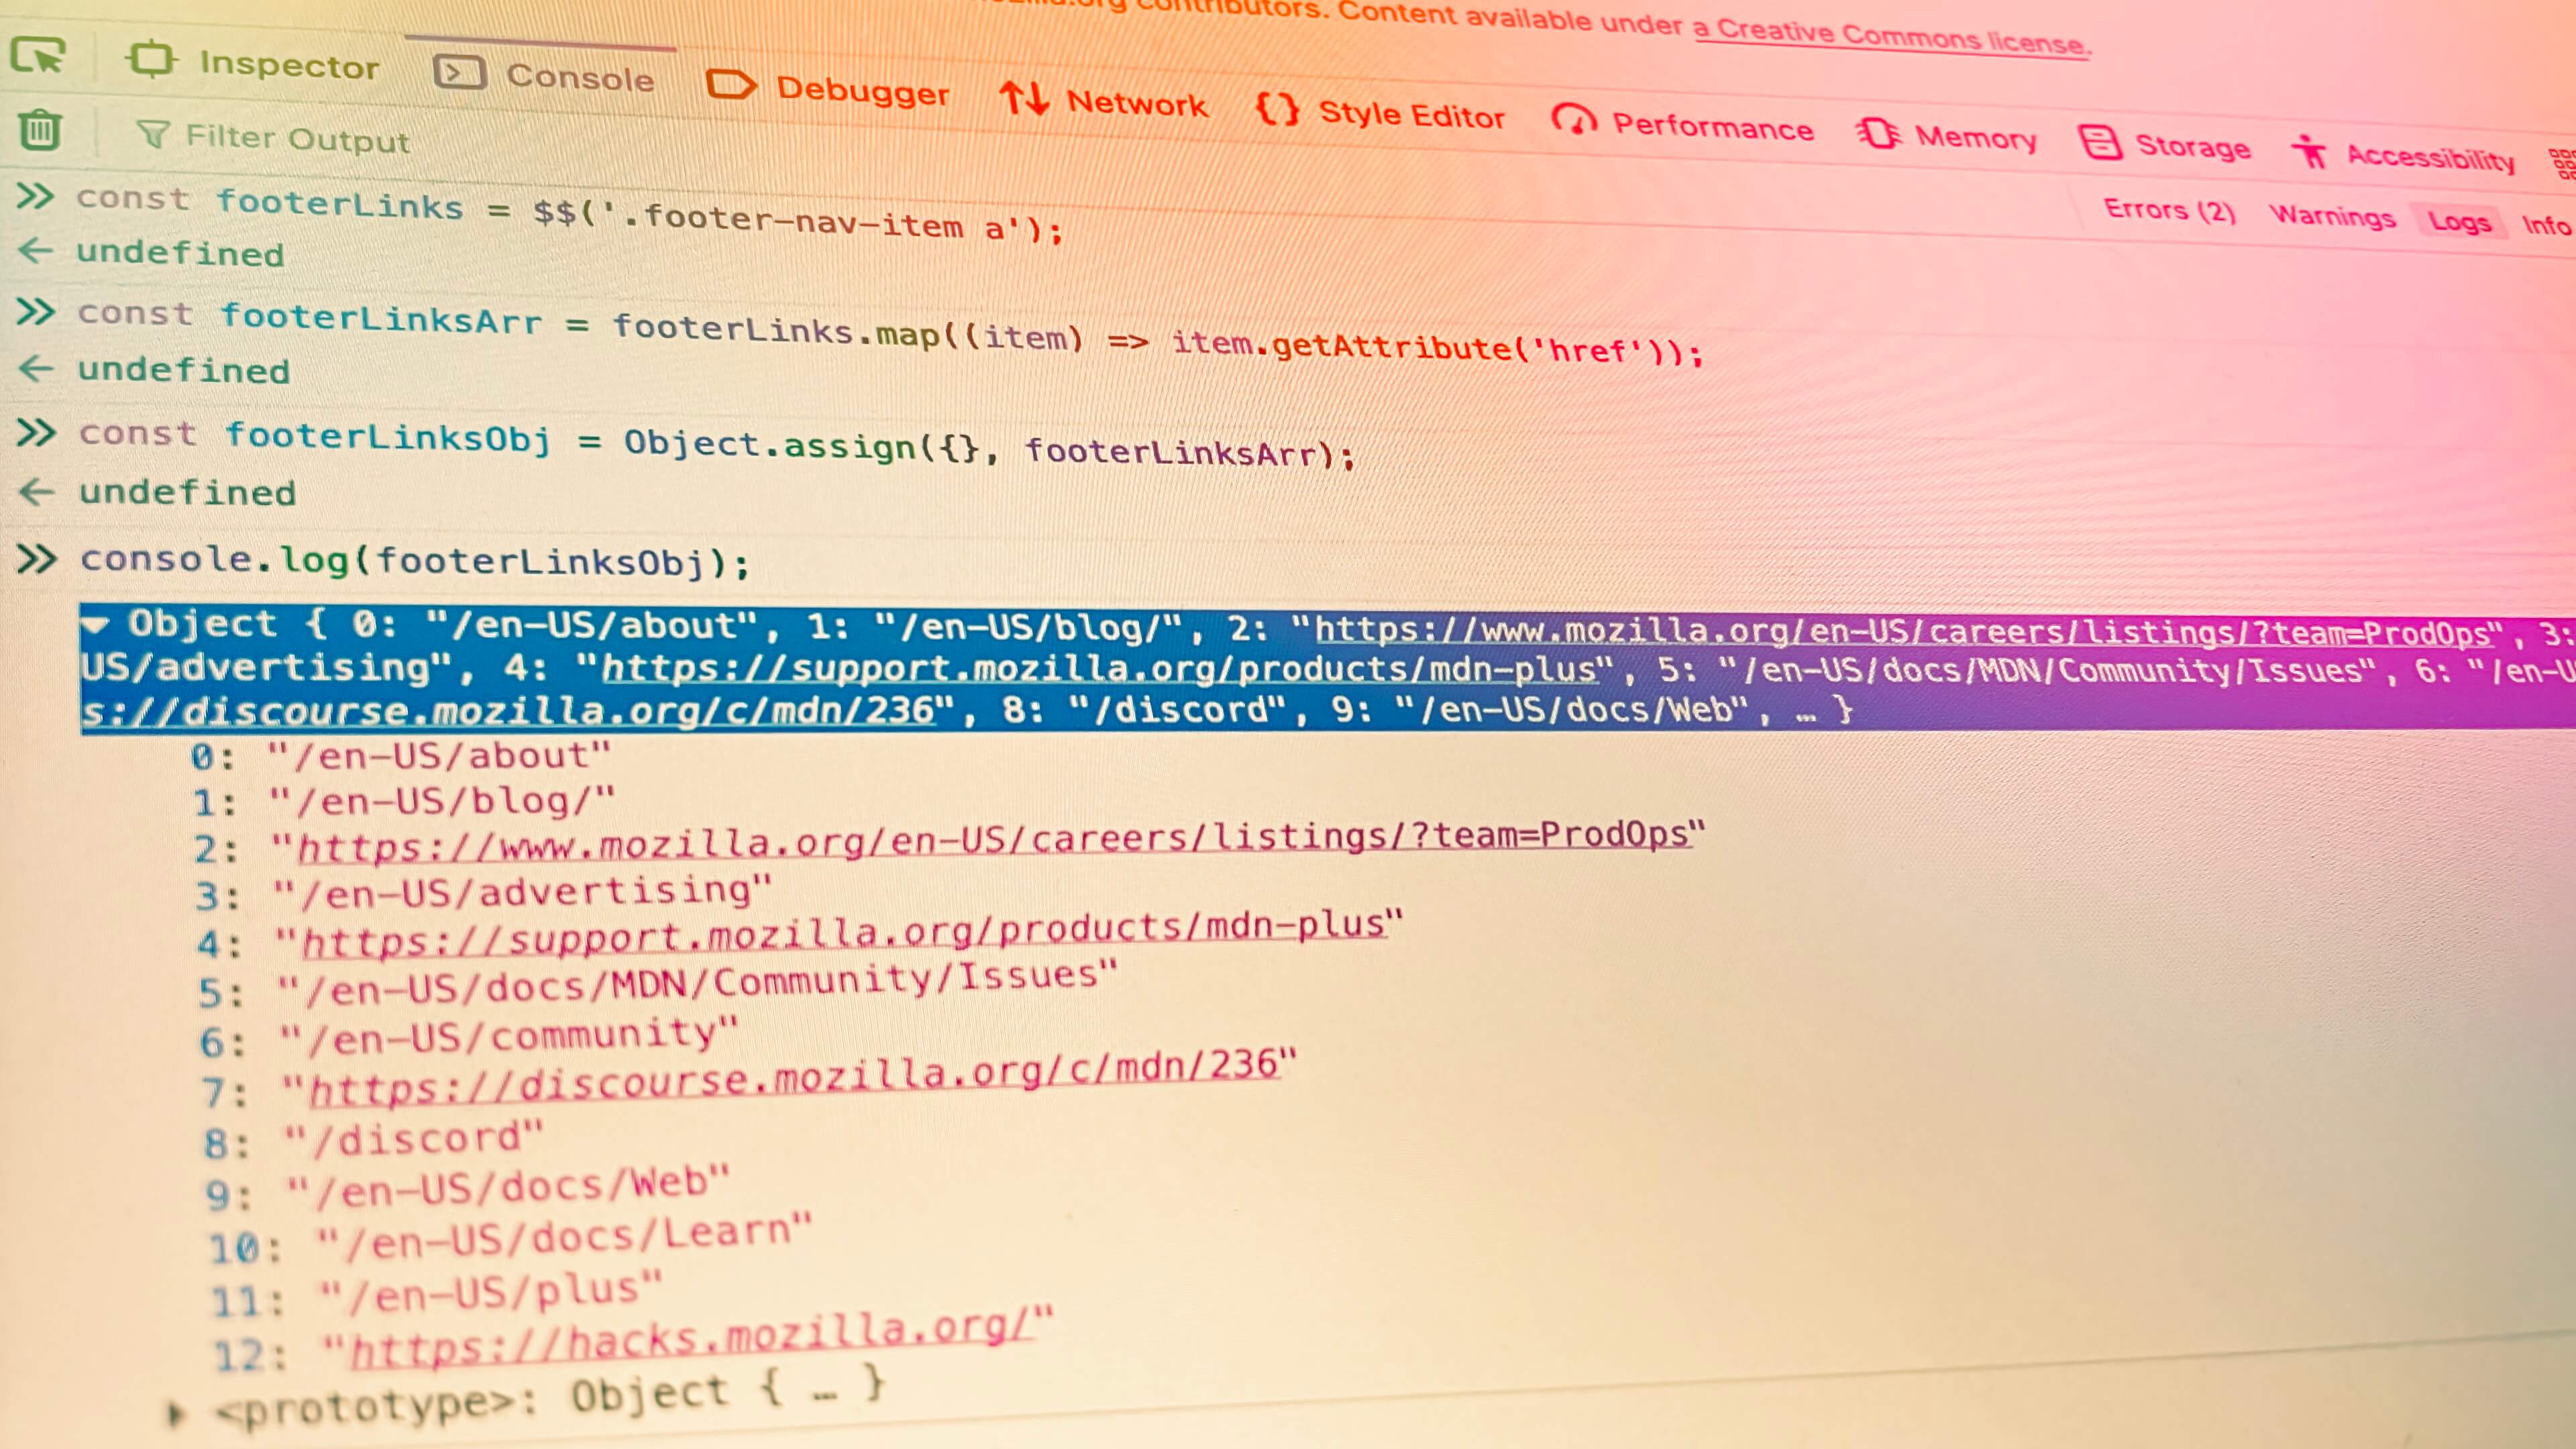
Browser DevTools provides invaluable assistance for the functional testing of web services. At a minimum, opened Browser Console will display errors on a testing web page.
The topic of this article is the Console’s command line — a tool that allows to evaluate JavaScript inside a browser. This means it allows to run scripts, modify DOM, and control the browser. That is why some popular websites show warning messages in the Console for ordinary users.
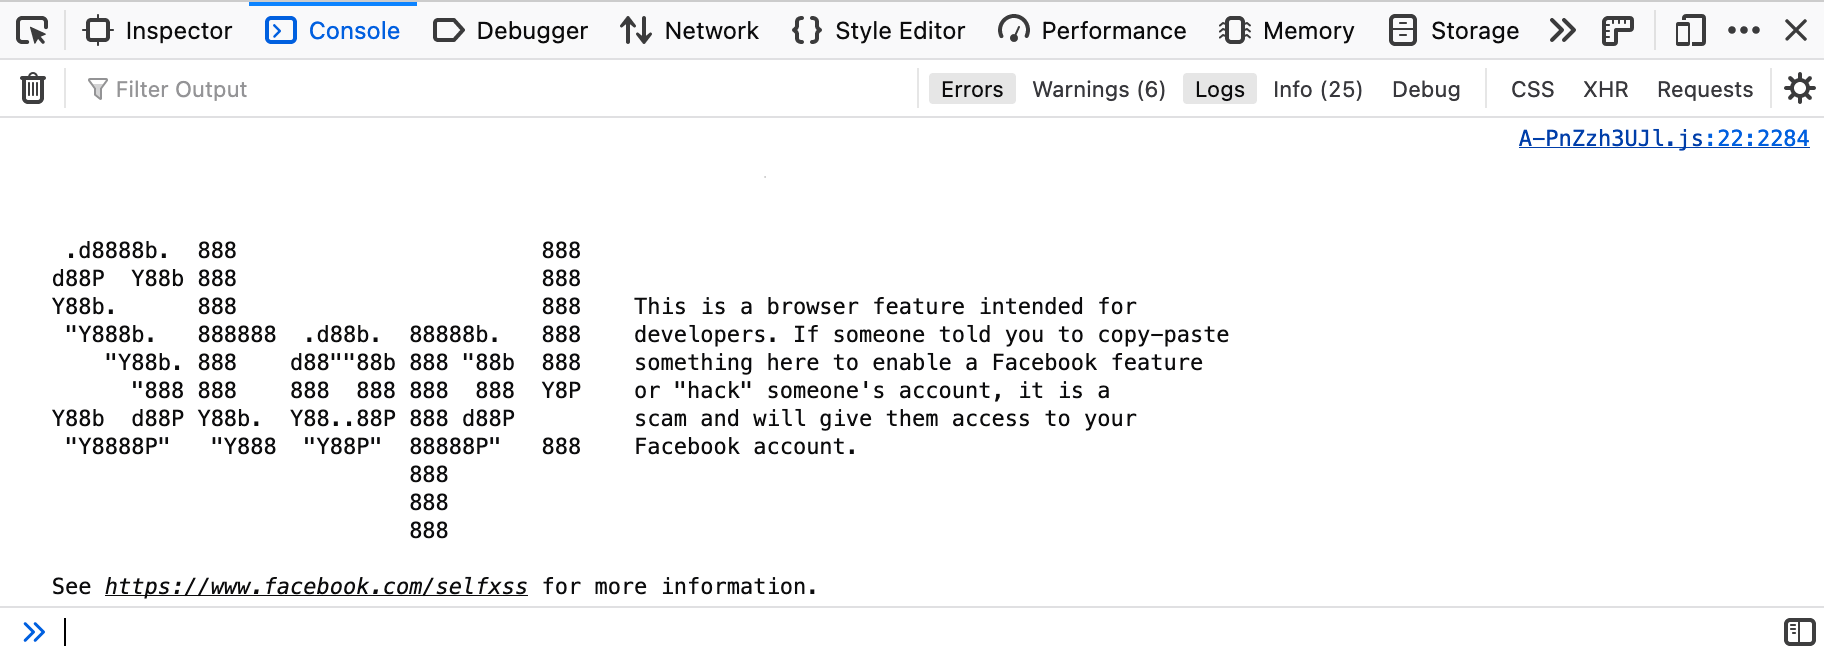
Fig. 1. Facebook.com Console Logs
The capabilities of the Console’s command line have several use cases, which will be extremely useful for test engineers.
- Run JavaScript in the Console;
- Find elements, evaluate and validate selectors;
- Modify selected elements;
- Copy almost anything;
- Parse a page;
- Represent data in a table view;
- Turn on design mode;
- Take screenshots (Firefox only).
1. Run JavaScript in the Console
Yes, you can execute code on JavaScript inside the browser’s Console! The possibilities are limited, but they are enough for simple calculations, scripts, and testing of proof of concepts.
// Calculation in the Console
2 * 2

// JavaScript script for getting a random number
const getRandomInt = (max) => {
  return Math.floor(Math.random() * max);
};
console.log(getRandomInt(10));

// Get Unix timestamp
console.log(Math.floor(Date.now()));

Fig. 2. JavaScript in the Console
This case includes the handy command $_. It returns the result of the last executed expression and can be used to engage a previous result in subsequent scripts.
2 * 2

// Return the result of the last expression
$_

// Calculate the square root of the last expression
Math.sqrt($_)

Fig. 3. $_
Further reading:
- Run JavaScript in the Console (Chrome);
- Run JavaScript in the Console (Microsoft Edge);
- Running JavaScript in the Browser Console.
2. Find elements, evaluate and validate selectors
Use document.querySelector() method to fetch a single element on the page (or the first one if several elements fit the selector). $ is a shorter way of the same command.
document.querySelector('.notecard');
or
$('.notecard');
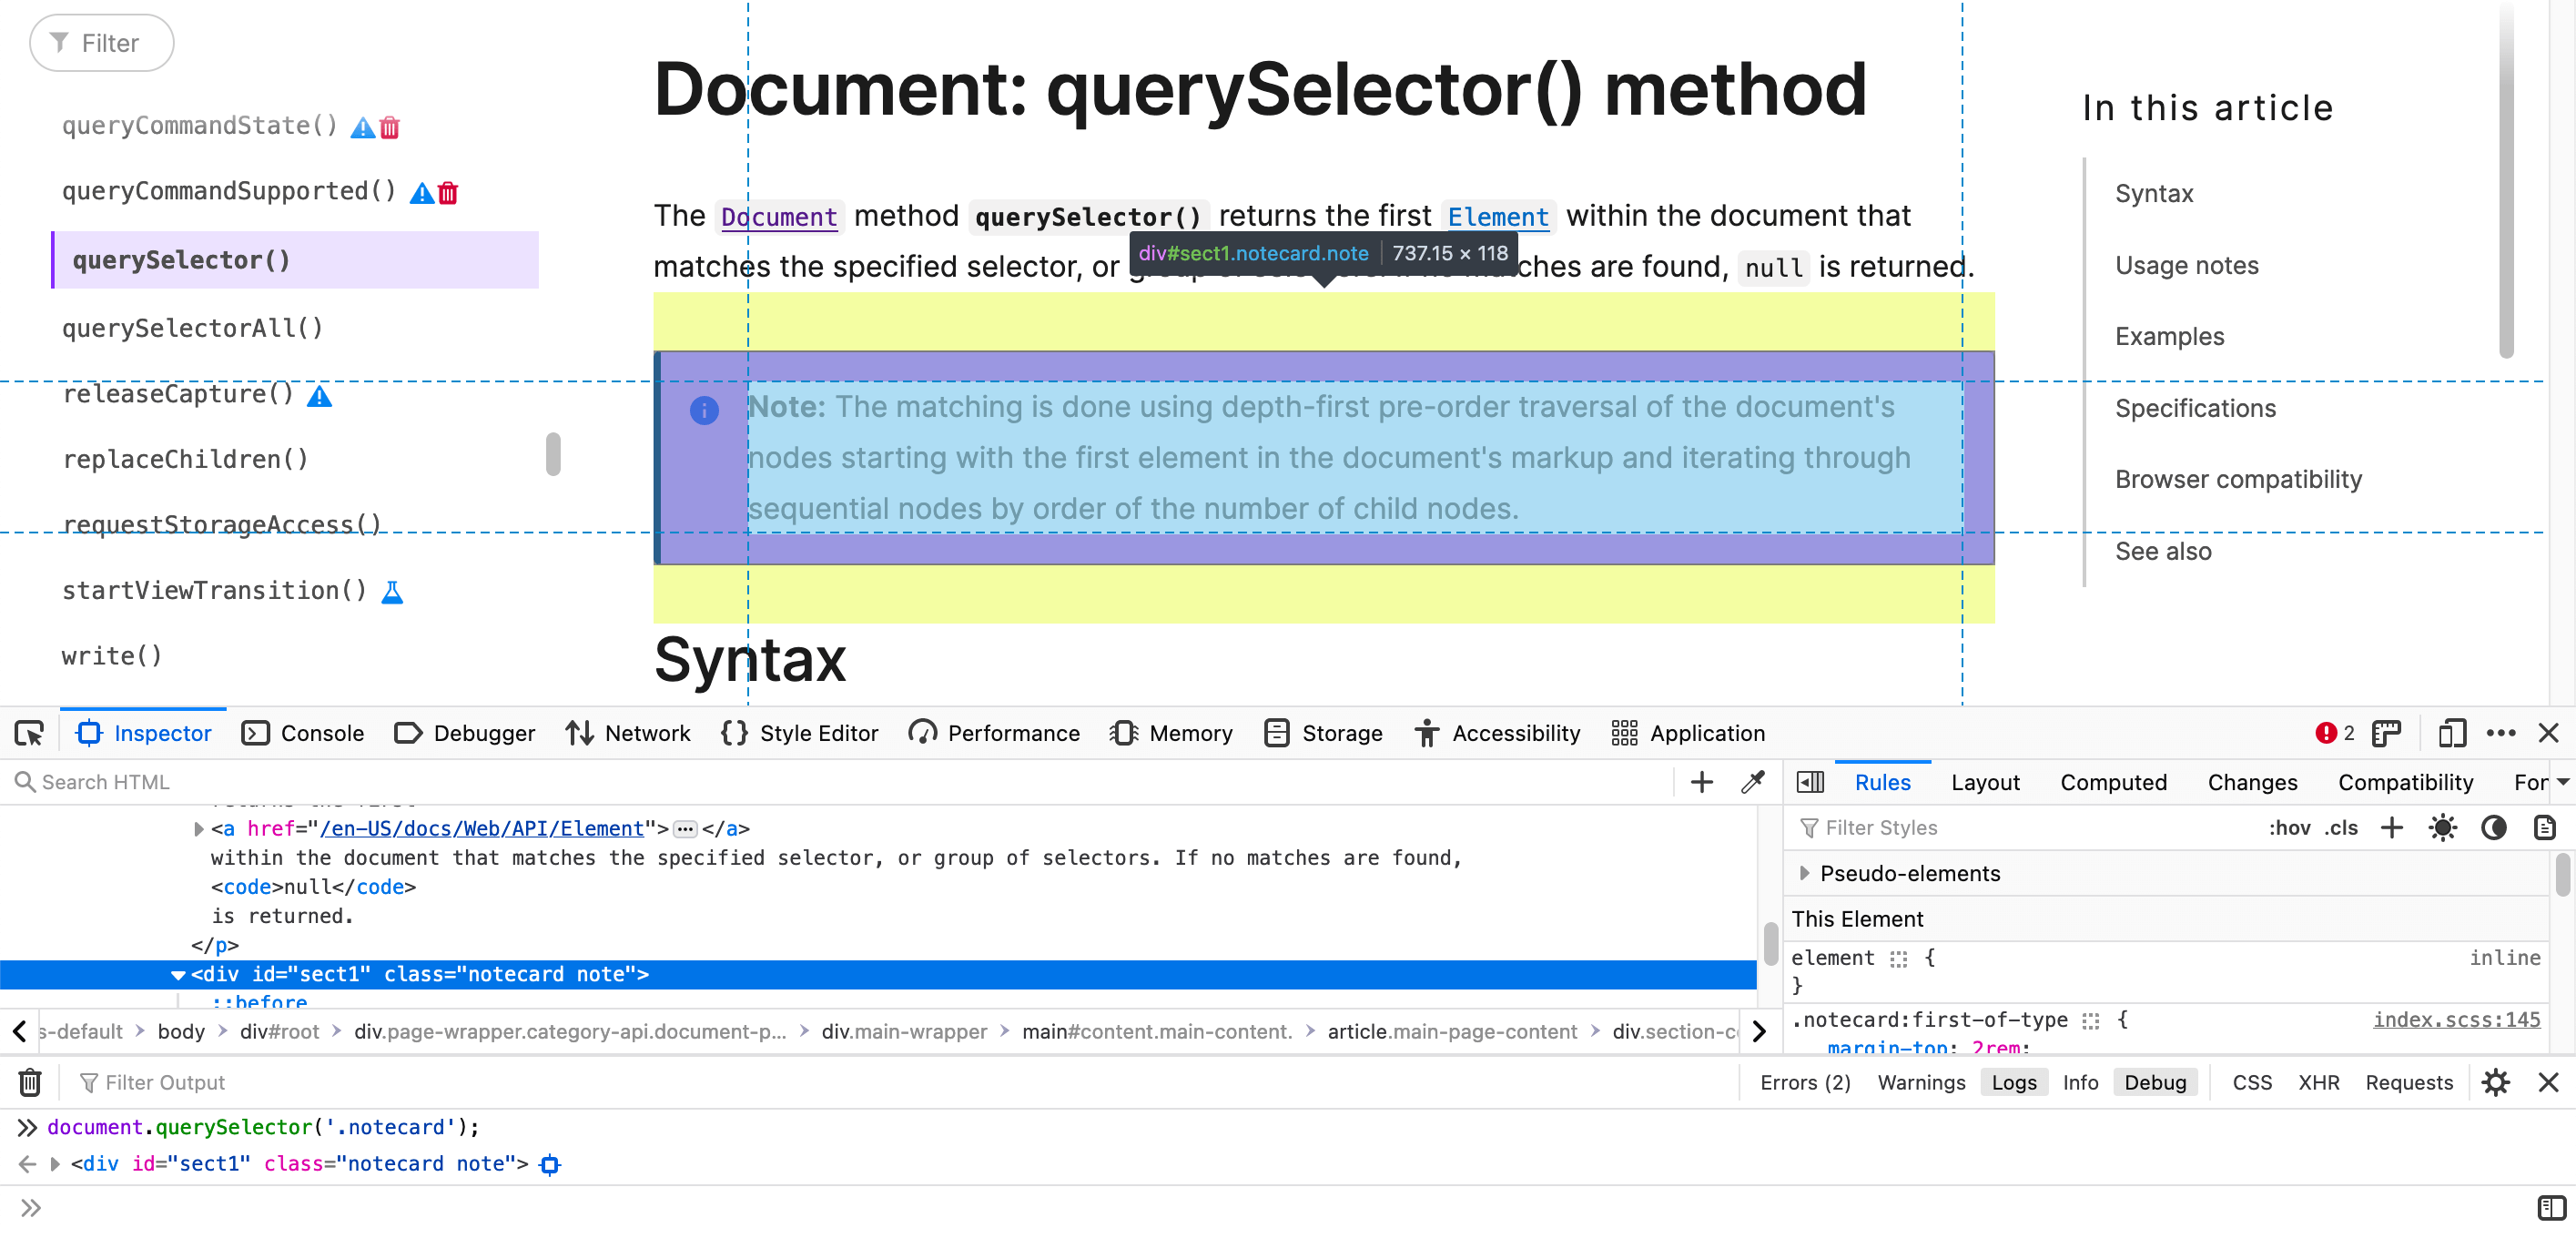
Fig. 4. document.querySelector(). In this and and the following illustrations the browser’s Console is split-opened in the Inspector tab
These methods are useful for finding elements on the page and for validating your selectors that are going to be used in autotests. Thus you can test pattern-matching of CSS selectors for required elements.
$('[class*=banner]');
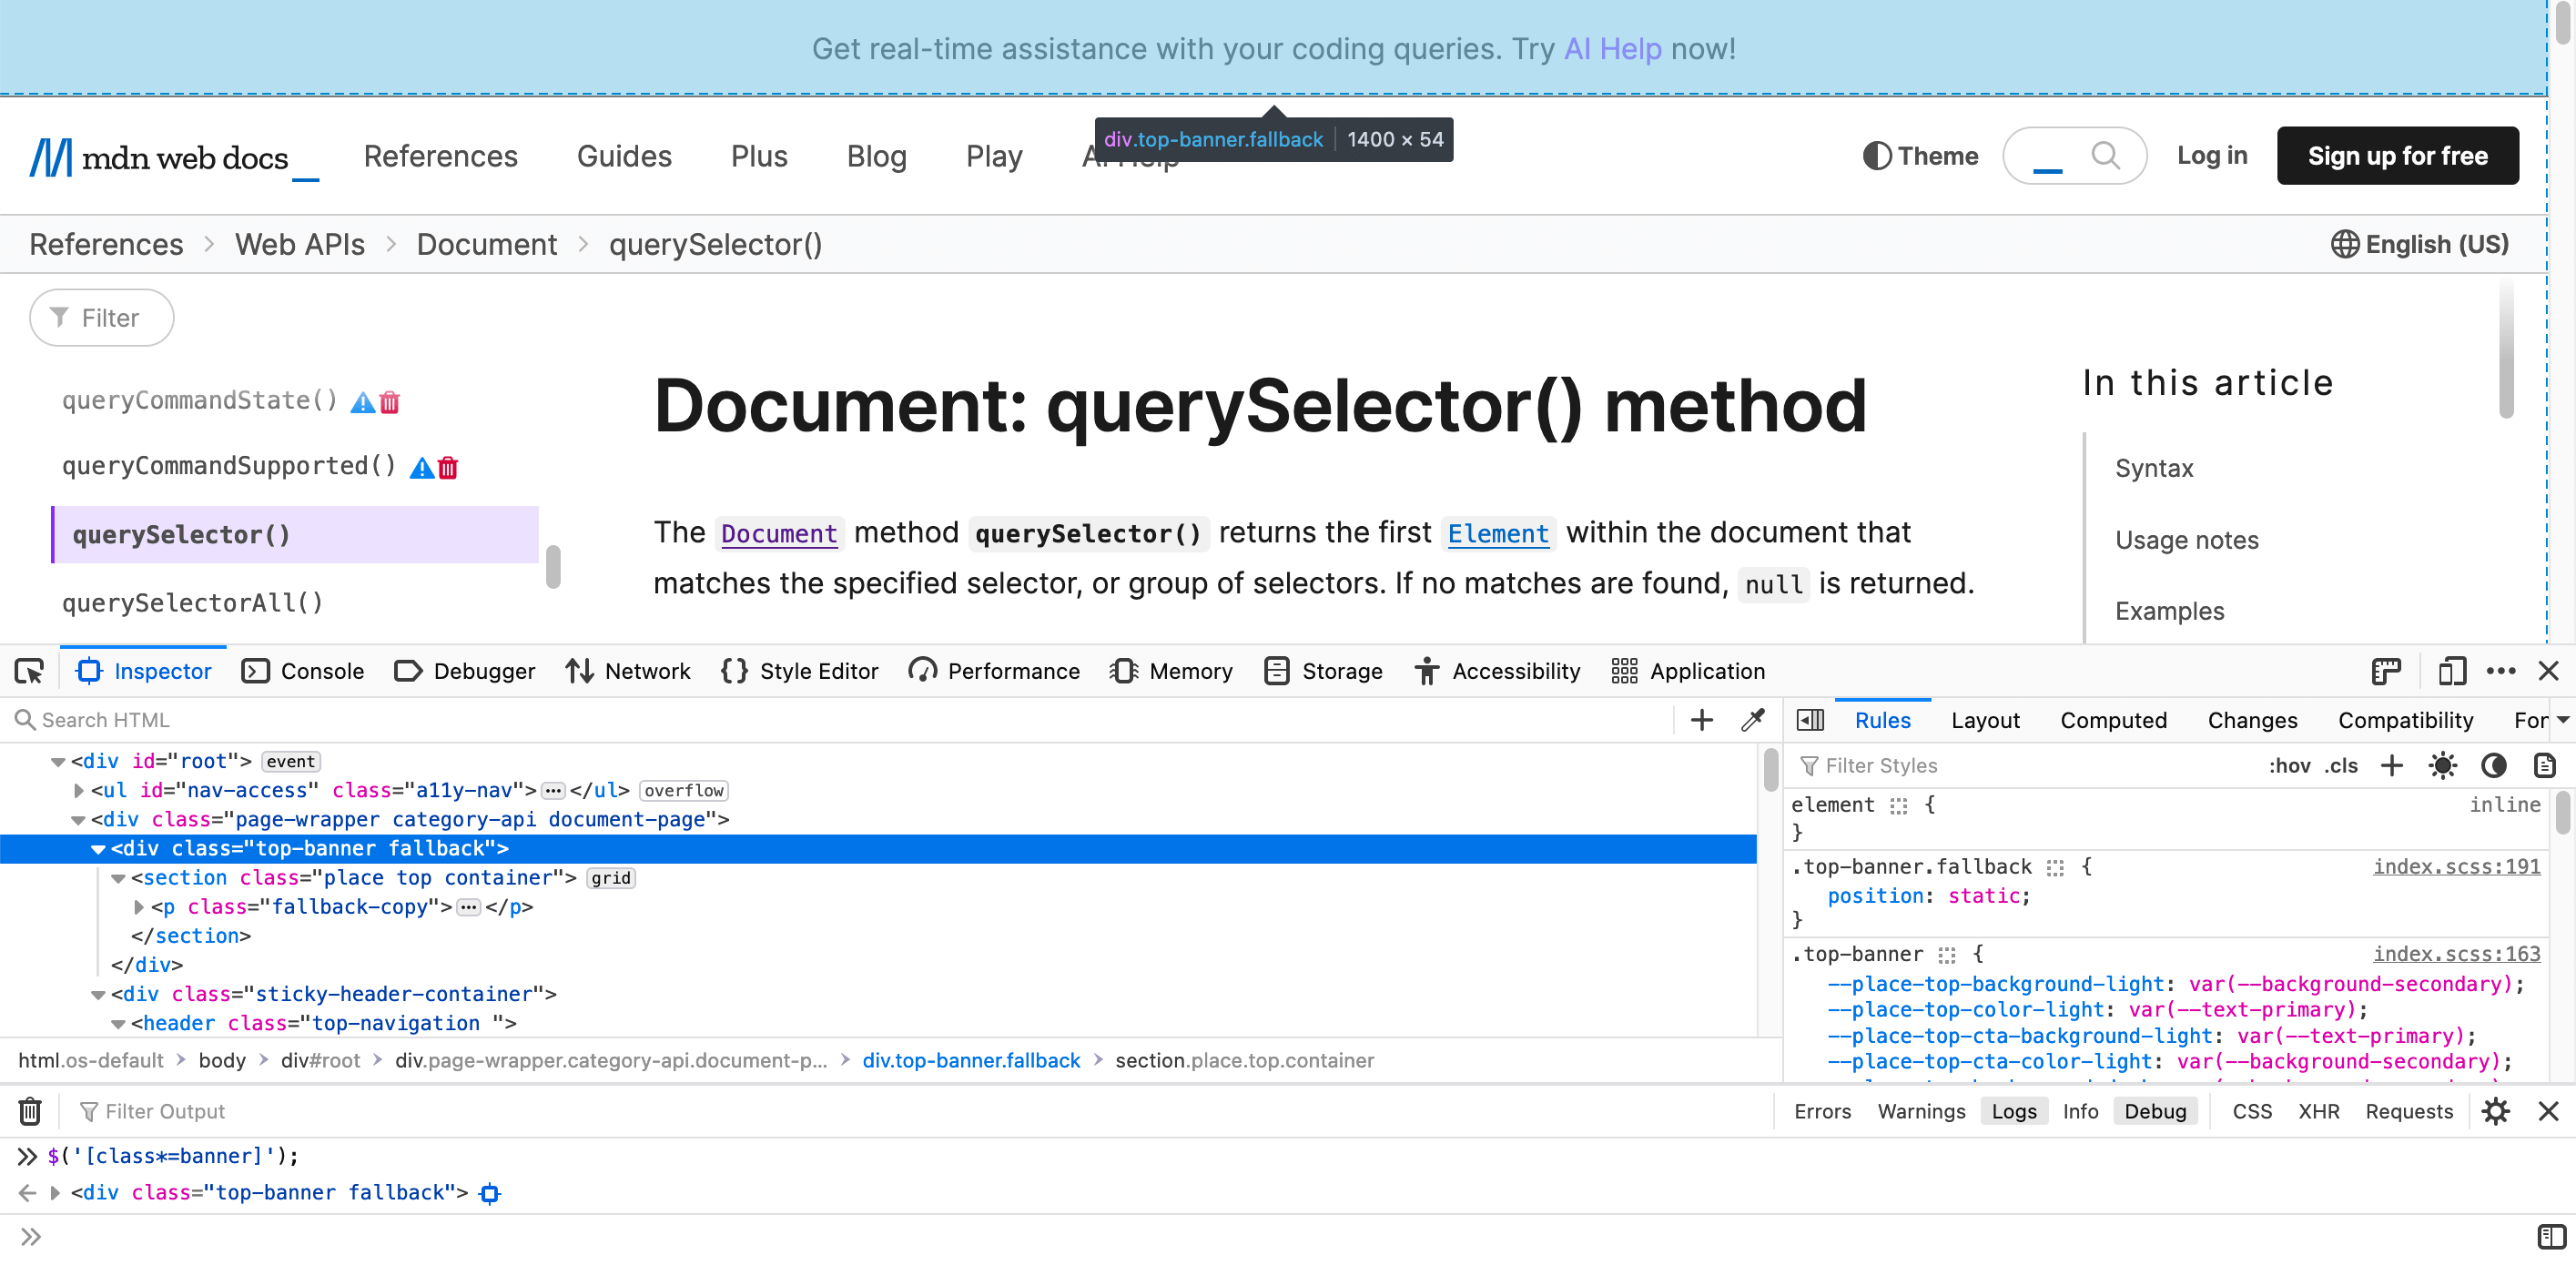
Fig. 5. document.querySelector() or $()_
Use document.querySelectorAll() for fetching multiple elements on the page, or $$ as a short alias.
document.querySelectorAll('[class^=code]');
or
$$('[class^=code]');
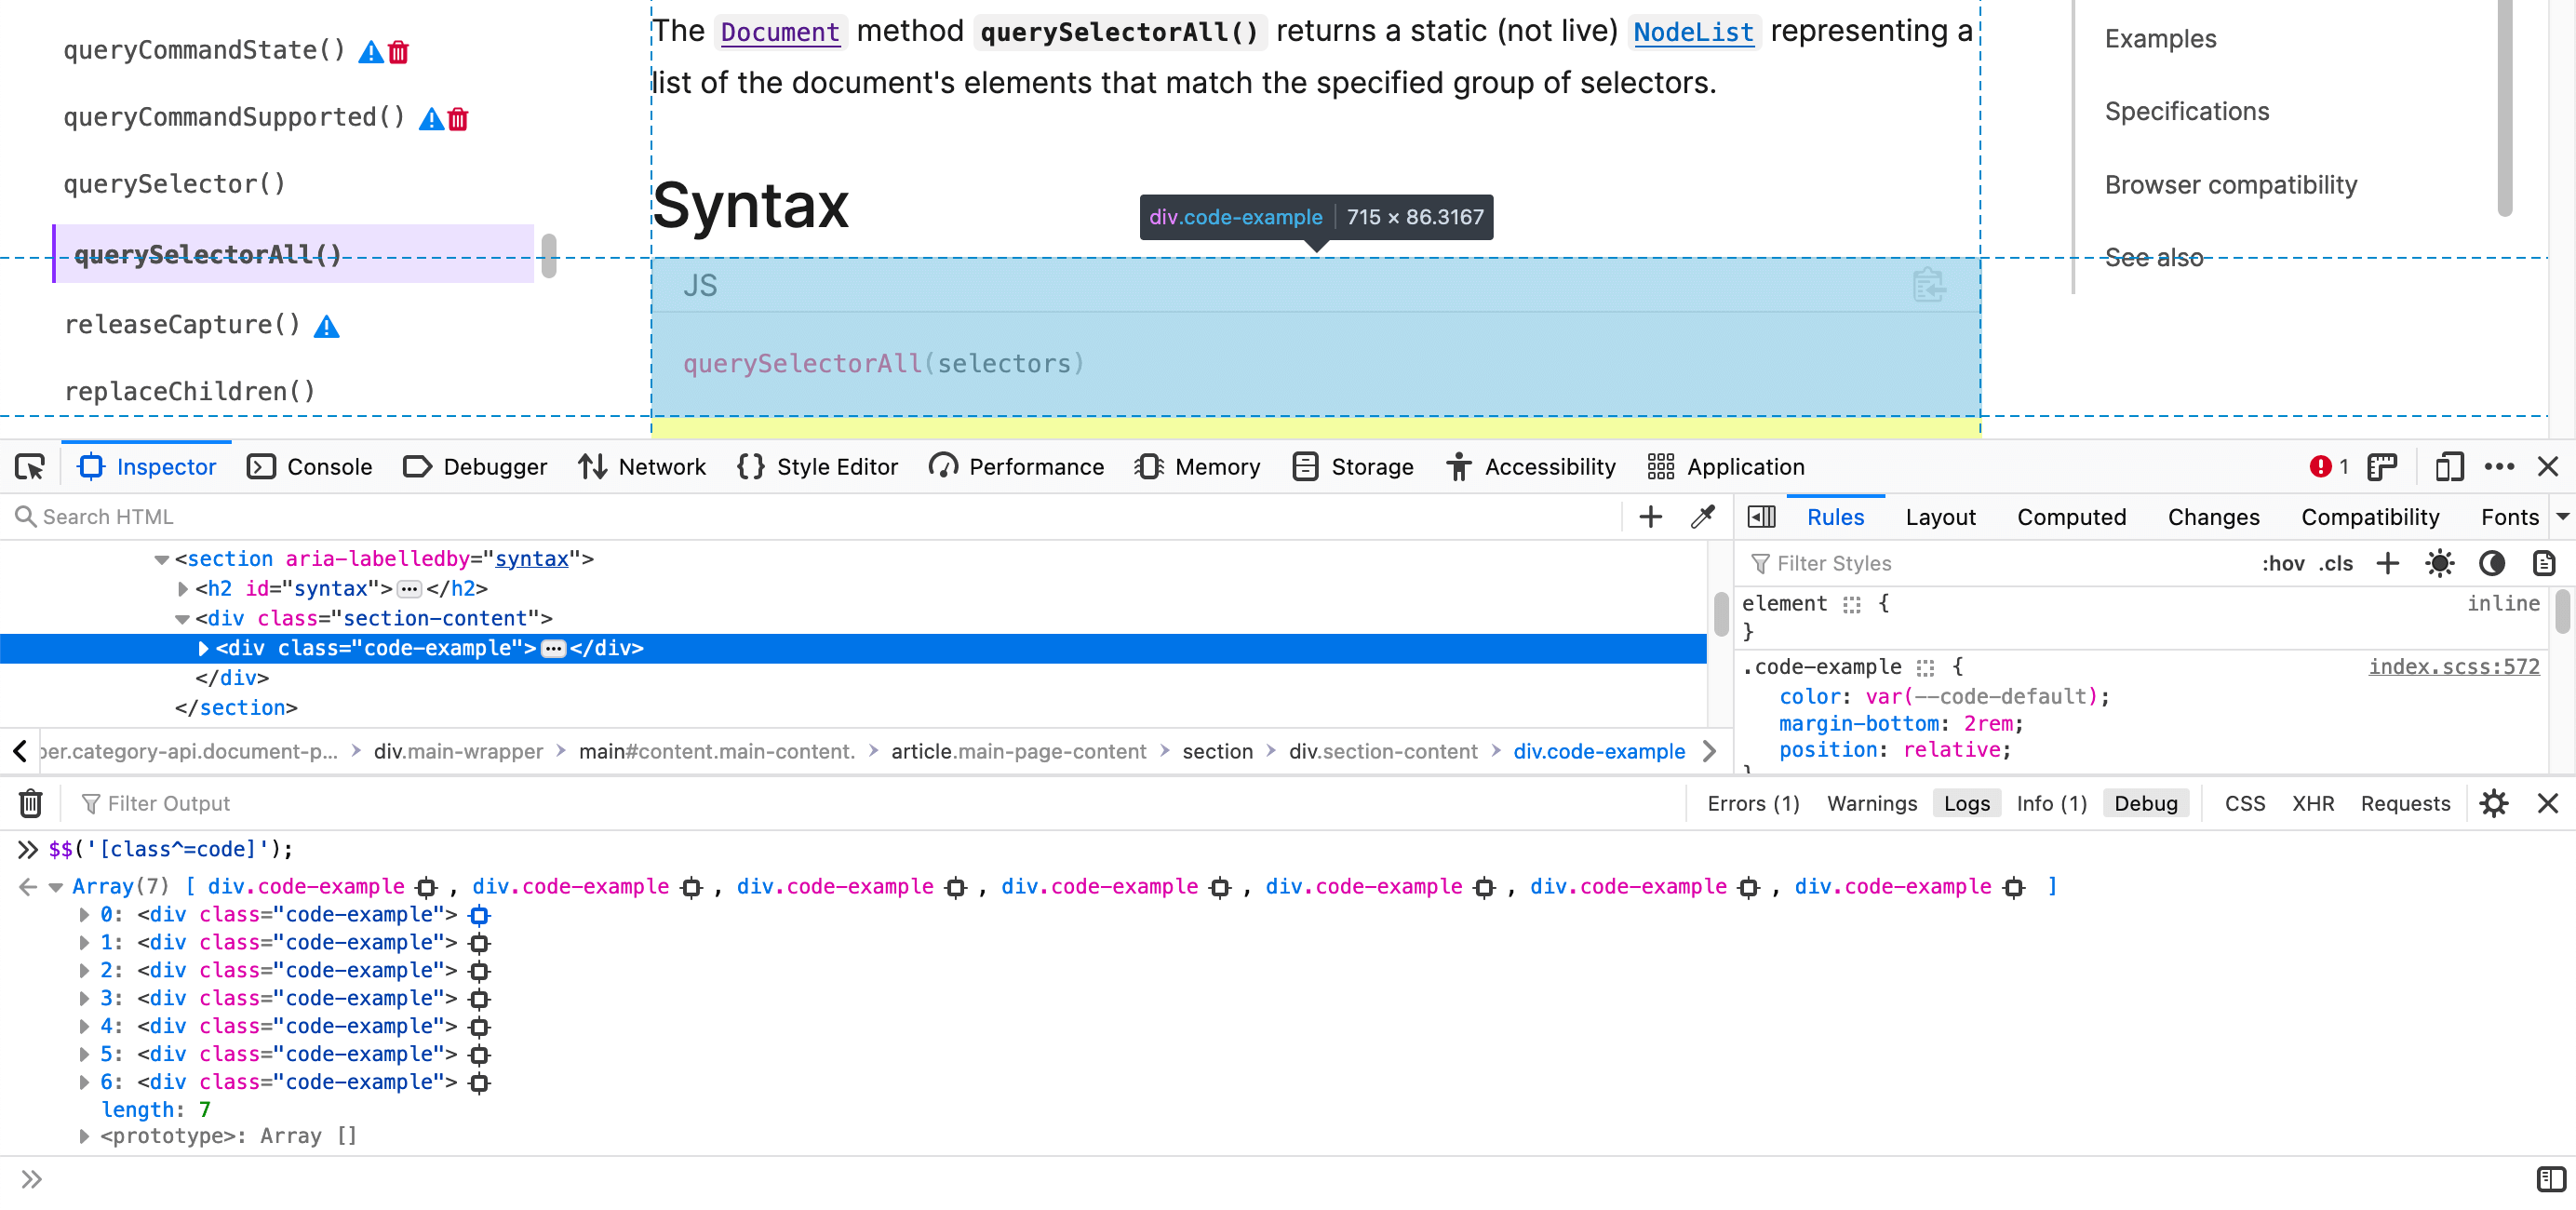
Fig. 6. document.querySelectorAll() or $$()
For manual testing, the output of the querySelectorsAll() in the form of an array is of practical importance. Test engineer can instantly get the number of required elements by the length of the array.
The task of counting particular elements on the page can also be done in a more programming way:
const numberOfSelectors = $$('[class^=code]').length;
console.log(numberOfSelectors);

Fig. 7. $$().length
For fetching XPath selectors, use $x.
$x('.//h1');
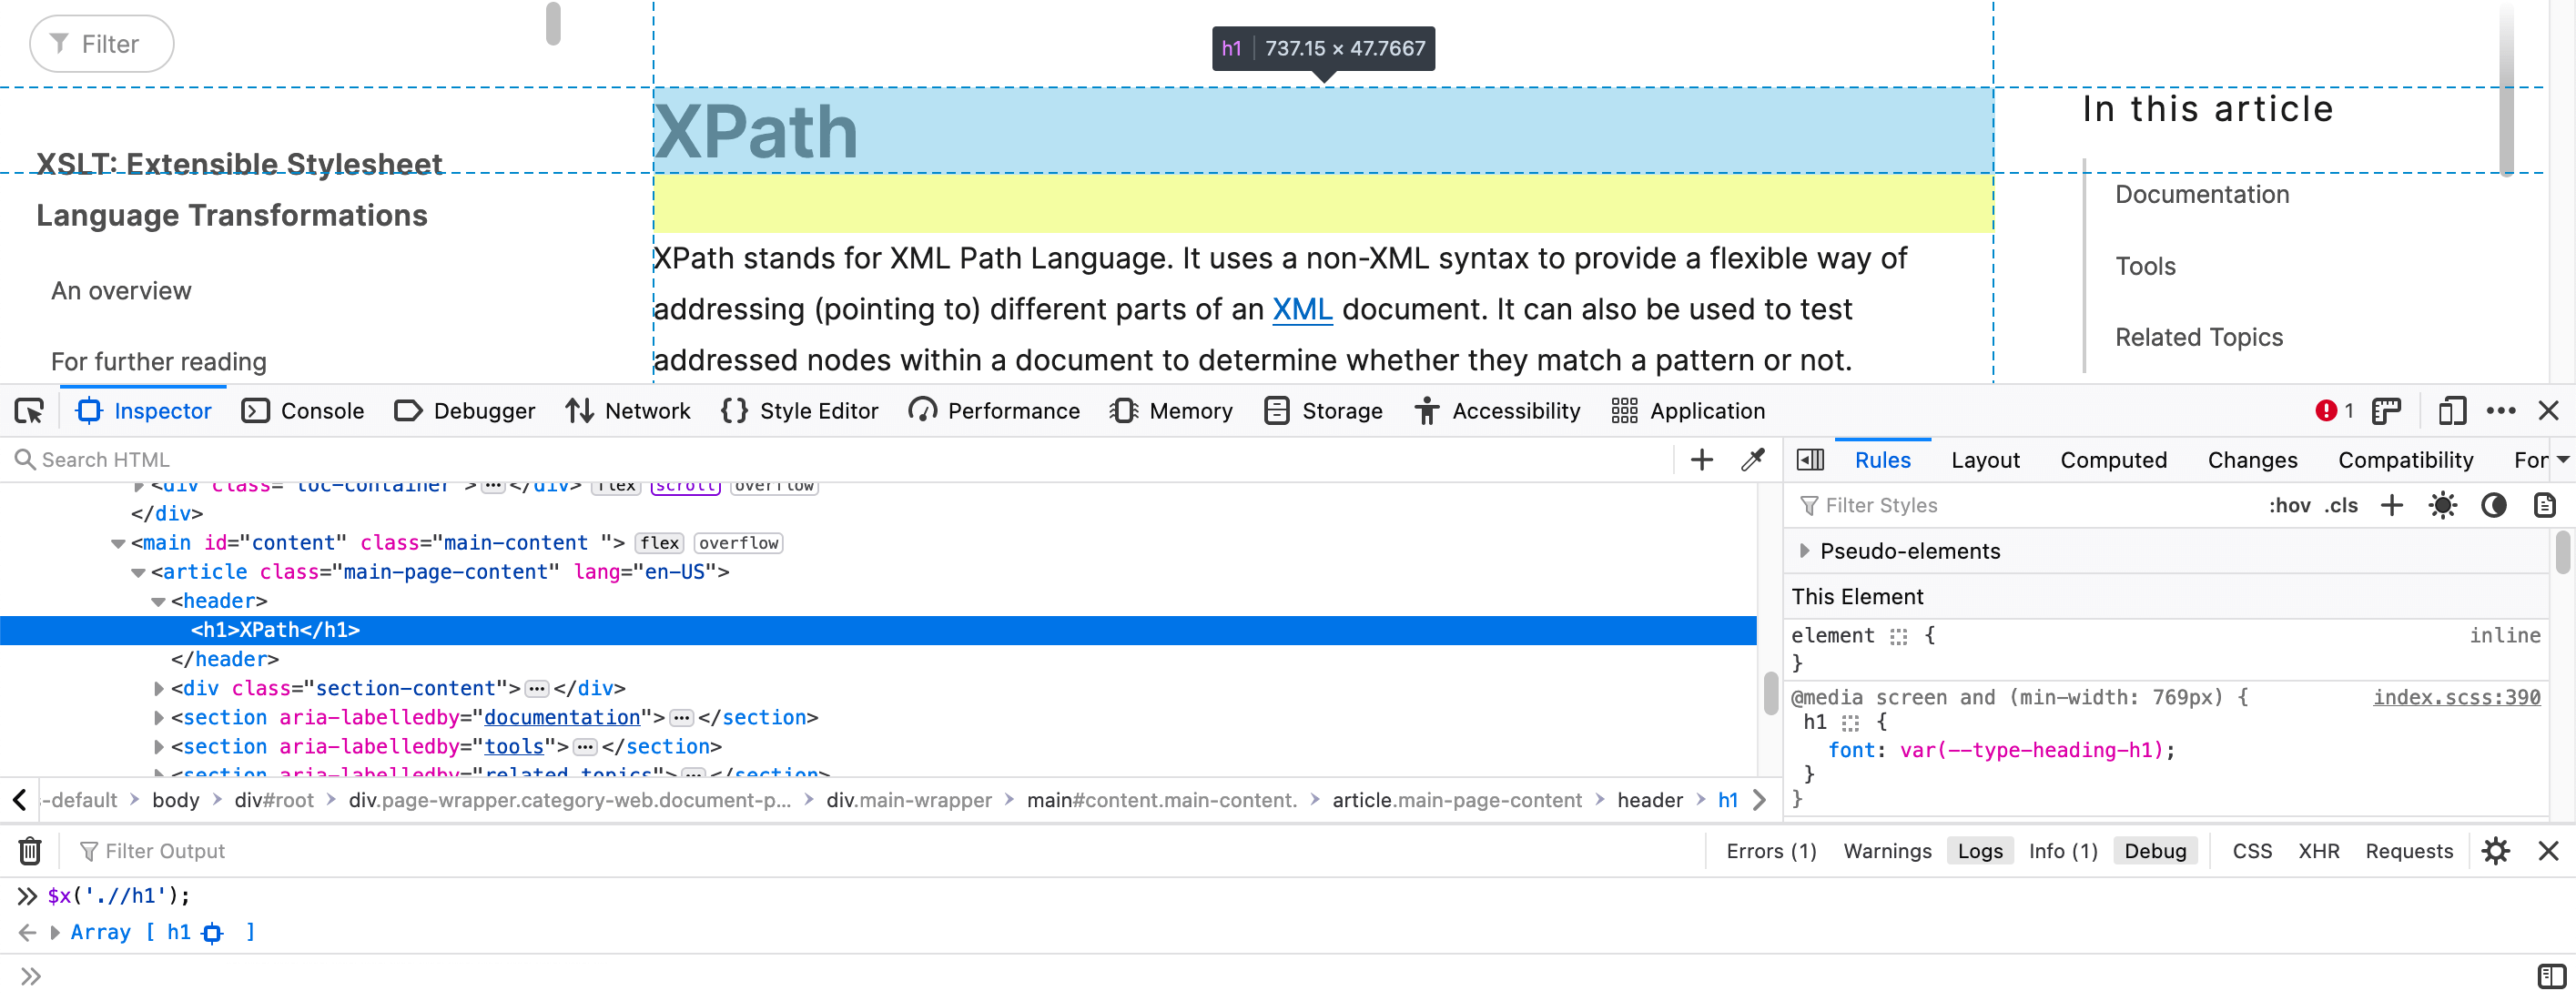
Fig. 8. $x()
If nothing matches with your selector, you will get null on the empty array.
Further reading:
3. Modify selected elements
Console allows to store currently-inspected element and refer to it for DOM modifications. To do that:
- Pic an element on the page;
- Return to console;
- Type the command:
$0
Now, if you type $0 again, you will get the element in the Console, and can modify the properties of the element (node in the DOM terms) or get the element’s properties and call HTMLElement methods.
// Evaluate stored element
$0

// Replace text context of the node
$0.innerText="Ad hoc"

// Evaluate the click on the element
$0.click();

Fig. 9. $0
Console allows to store up to five elements, and they will be available by $0, $1, $2, $3, and $4.
Further reading:
- Console Utilities API reference (Chrome);
- Web Console Helpers (Firefox);
- A few developer console tricks.
4. Copy almost anything
After evaluation of the element (or an output of JS code), you can copy it directly from the Console.
copy($('[class*=beta]'));
Copied content:
<sup class="new beta">Beta</sup>

Fig. 10. copy()
NOTE: copy() does not copy recursive objects!
For example, if you get an array of elements by querySelectorsAll() and want to copy them through copy() — you will get nothing because of an array of elements.
// Evaluate all matching elements
$$('button.top-level-entry');

// Copy the result of the last expression
copy($_);
Copied content:
[
  {},
  {},
  {}
]
Unfortunately, there is no way to fix it due to recursive objects.

Fig. 11. copy() does not copy recursive objects
But there is good news:
- You can easily copy all localStorage:
copy(localStorage); - And copy all cookies:
copy(document.cookie);
Further reading:
- How to Copy an Object or Array from the Console tab;
- How to Copy a Big Object or Array From Console to Clipboard.
5. Parse a page
Combining all the previous knowledge, you can perform advanced actions, for example, parse links from a page.
// Evaluate all links with .footer-nav-item class
const footerLinks = $$('.footer-nav-item a');

// Get only href attribute from an each element
const footerLinksArr = footerLinks.map((item) => item.getAttribute('href'));

// Convert array of objects into a plane object
const footerLinksObj = Object.assign({}, footerLinksArr);

// Copy object
copy(footerLinksObj);
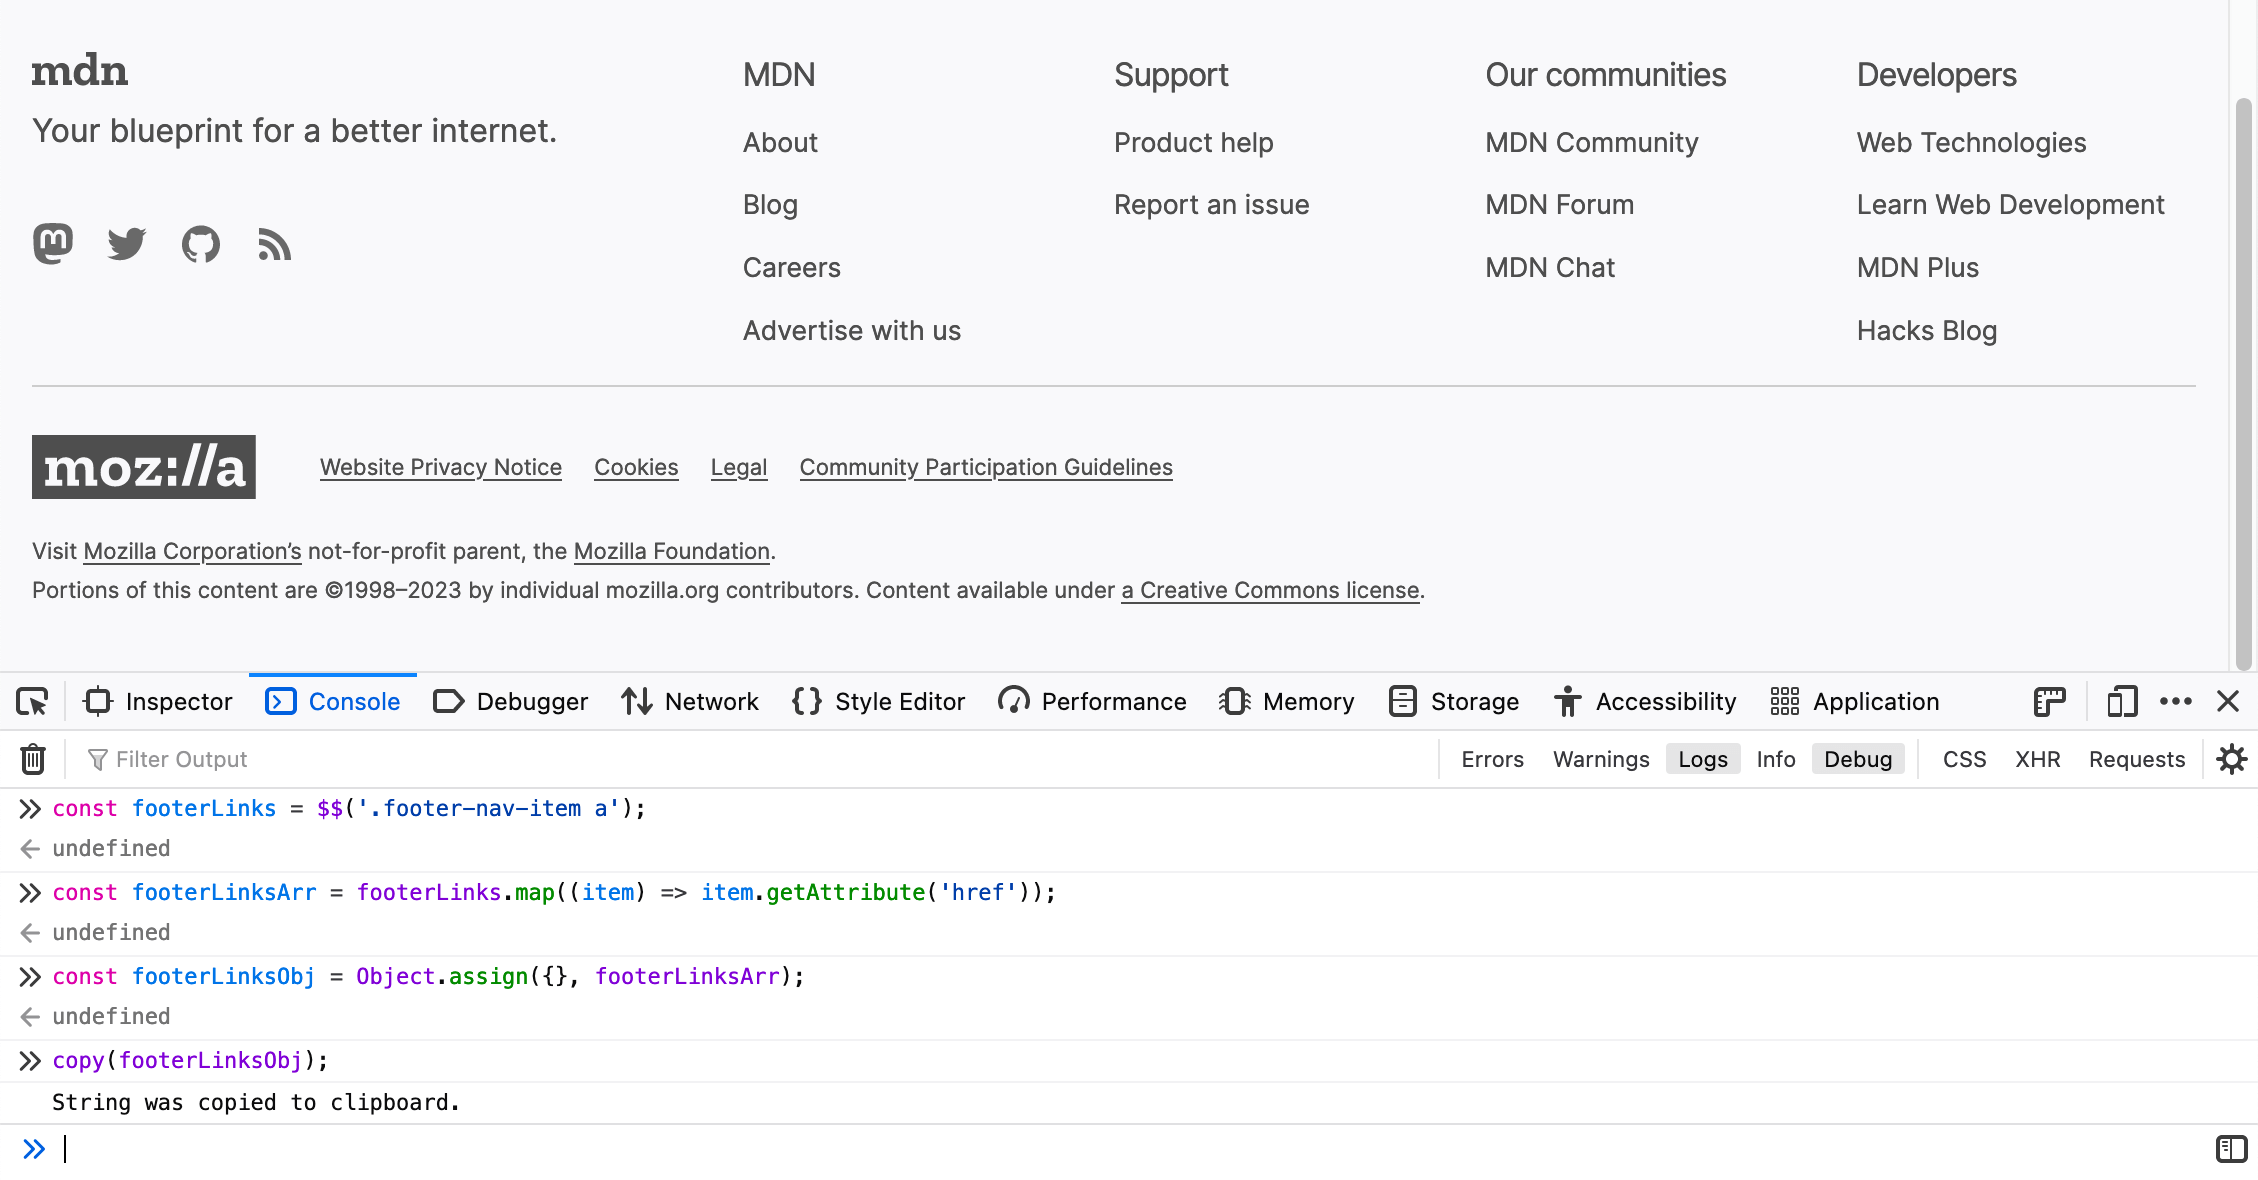
Fig. 12. Parse links from the page’s footer
Copied content:
{
  "0": "/en-US/about",
  "1": "/en-US/blog/",
  "2": "https://www.mozilla.org/en-US/careers/listings/?team=ProdOps",
  "3": "/en-US/advertising",
  "4": "https://support.mozilla.org/products/mdn-plus",
  "5": "/en-US/docs/MDN/Community/Issues",
  "6": "/en-US/community",
  "7": "https://discourse.mozilla.org/c/mdn/236",
  "8": "/discord",
  "9": "/en-US/docs/Web",
  "10": "/en-US/docs/Learn",
  "11": "/en-US/plus",
  "12": "https://hacks.mozilla.org/"
}
The beauty of this operation is that it was done just inside the browser without any additional tooling!
6. Represent data in a table view
Console has the table() method for the readability of arrays and plain objects. It accepts an array as parameters (or index-values of a plain object) and displays them in a table view.
console.table($_);
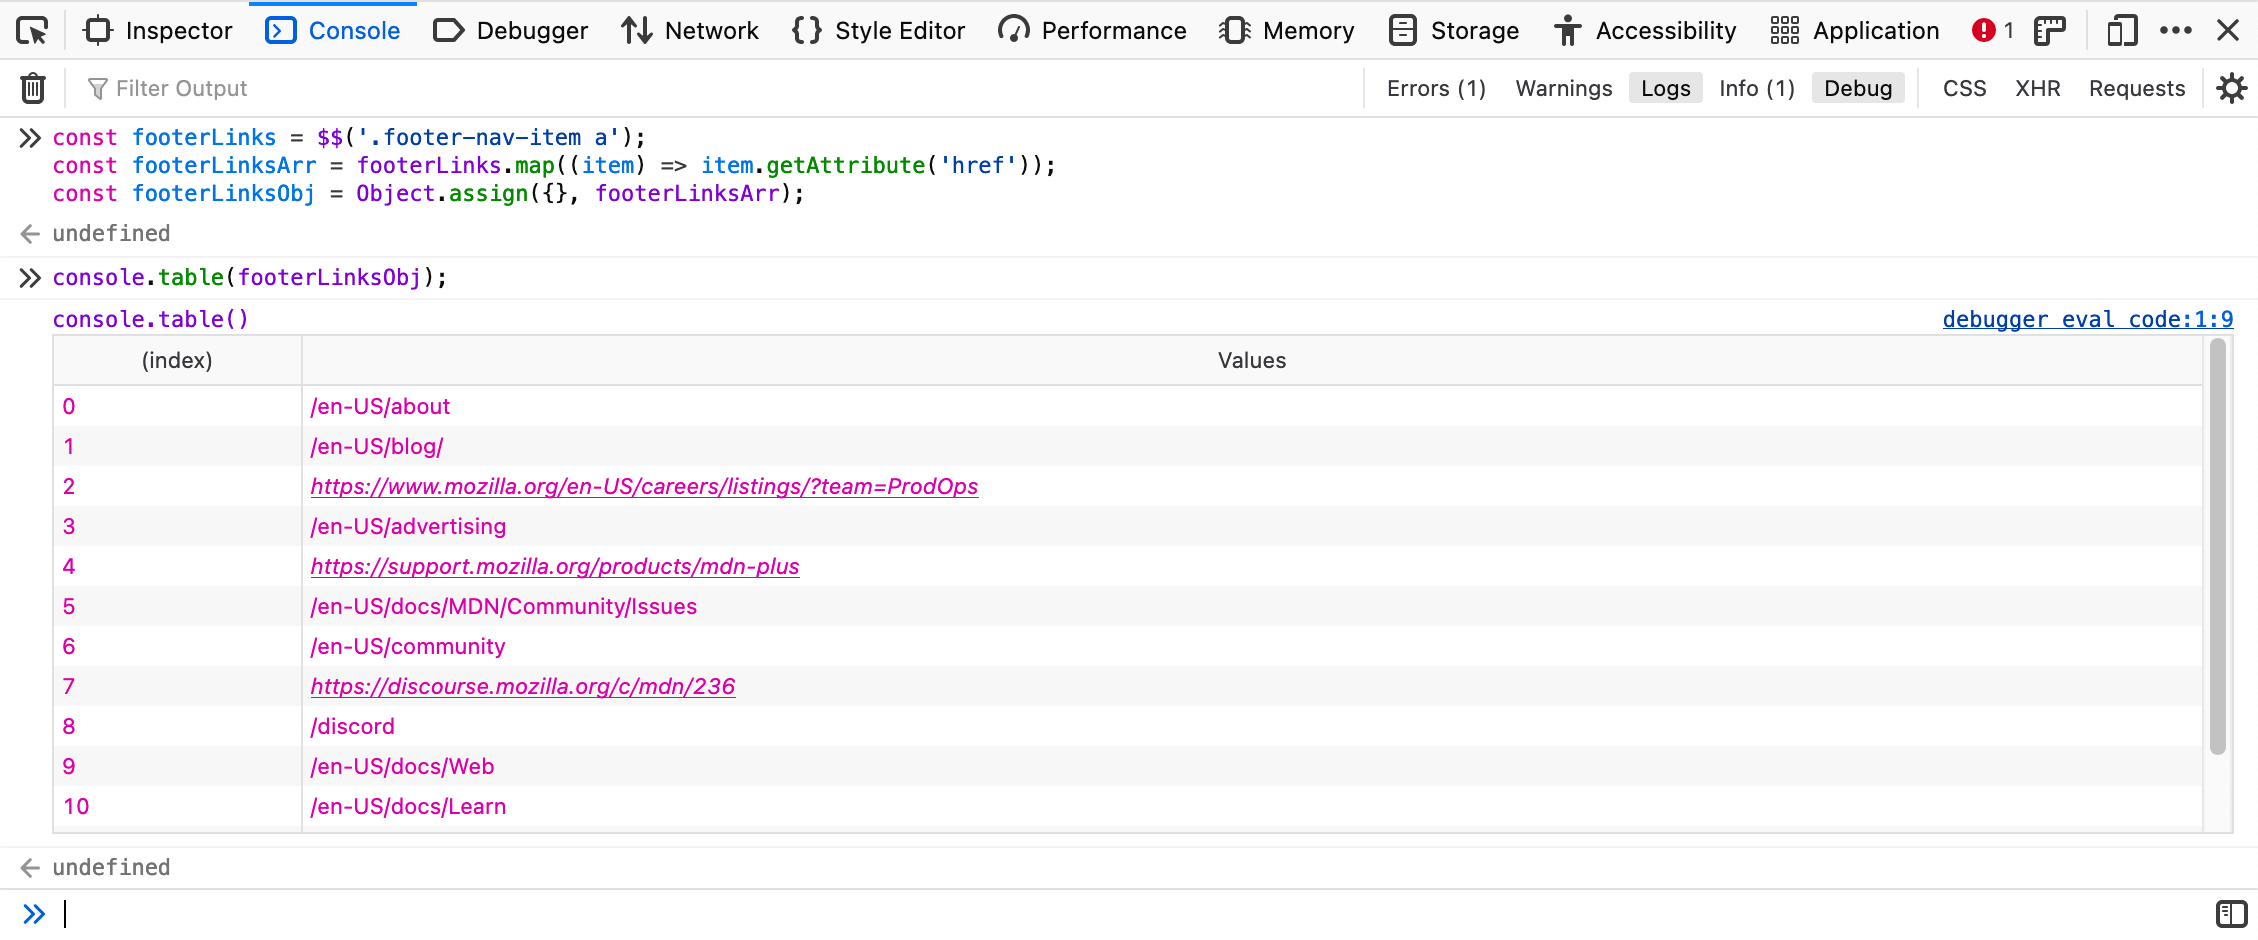
Fig. 13. console.table()
7. Turn on design mode
The cherry on top for manual testers is a chance to set ALL texts on the page to editable. That is done by changing Document designMode property’s value.
document.designMode = "on"
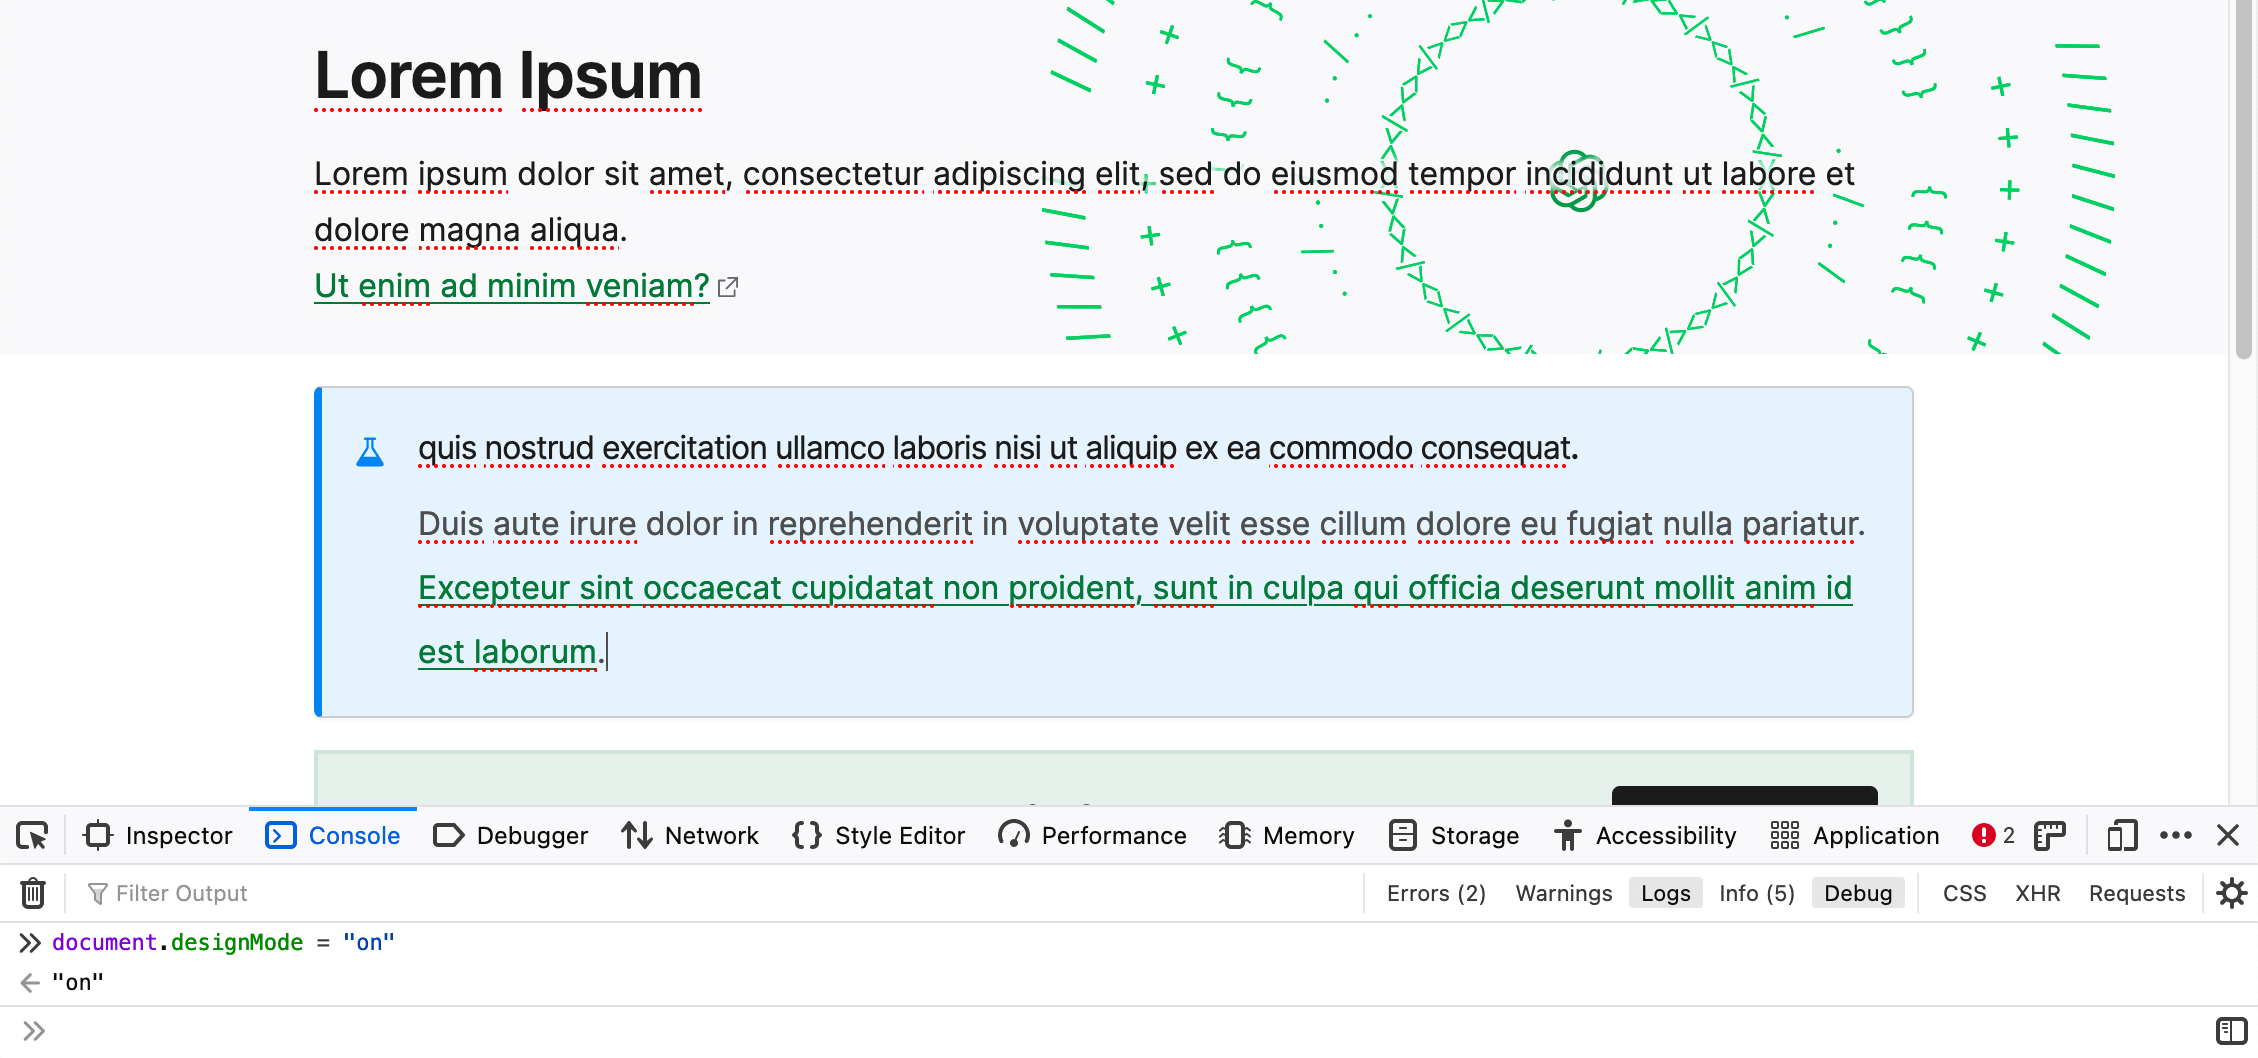
Fig. 14. Design mode is on ⇒ all document is editable
Further reading about all Console’s features:
8. Take screenshots (Firefox only)
Firefox has one special feature — taking screenshots by Console’s command:
:screenshot— taking a screenshot of a currently visible viewport;:screenshot --fullpage— taking a screenshot of the full page.

Fig. 15. :screenshot in Firefox
Further reading:
9. Detect which element has the focus
That hack is essential during A11y testing: when you navigate through the page by pressing the TAB key, you can lose a focus element (the outline property can be none, a focused element can be hidden, or elements’ order can be unpredictable).
document.activeElement — shows an element that currently has focus.
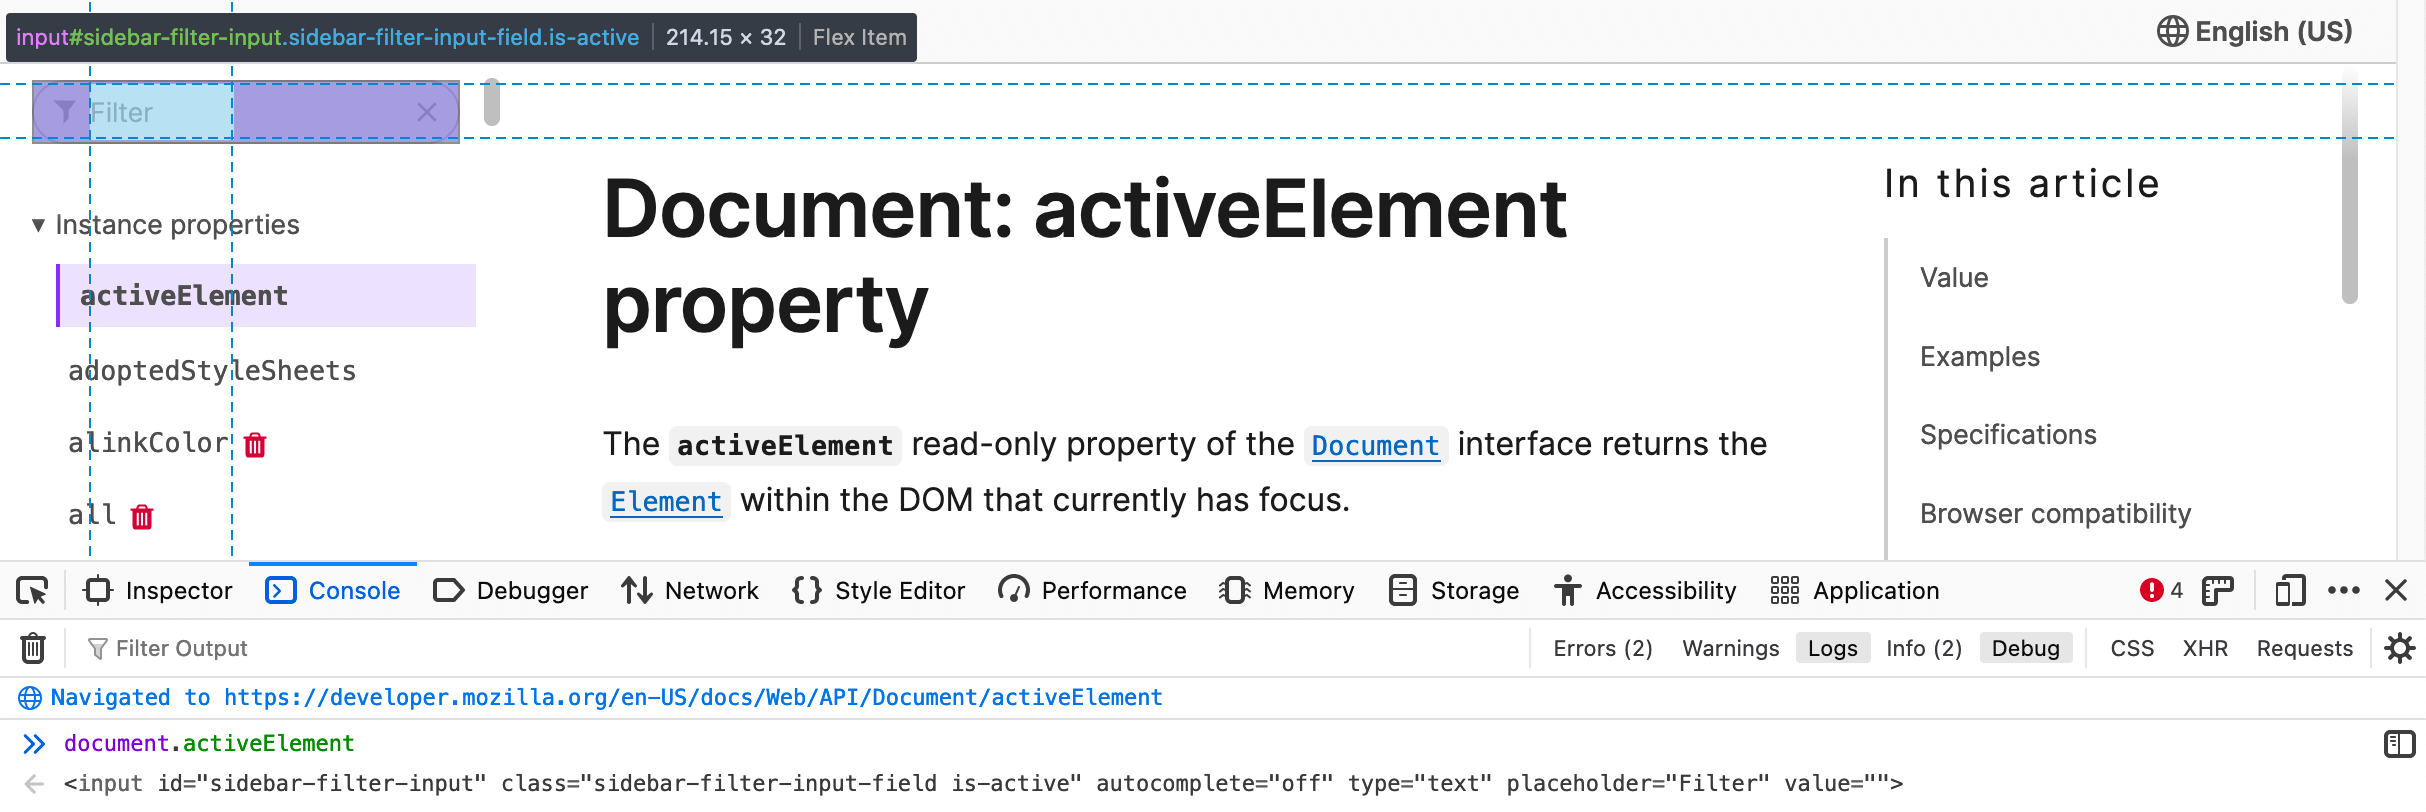
Fig. 16. document.activeElement in Firefox console
Moreover, in Chrome DevTools, you can use Live Expression to watch your command’s values in real time:
- Click on [Create live expression] (an eye-like button);
- In the appeared «Expression» input, type
document.activeElement - Now click on the page or tab around and see how the live expression’s output will update the currently focused element.
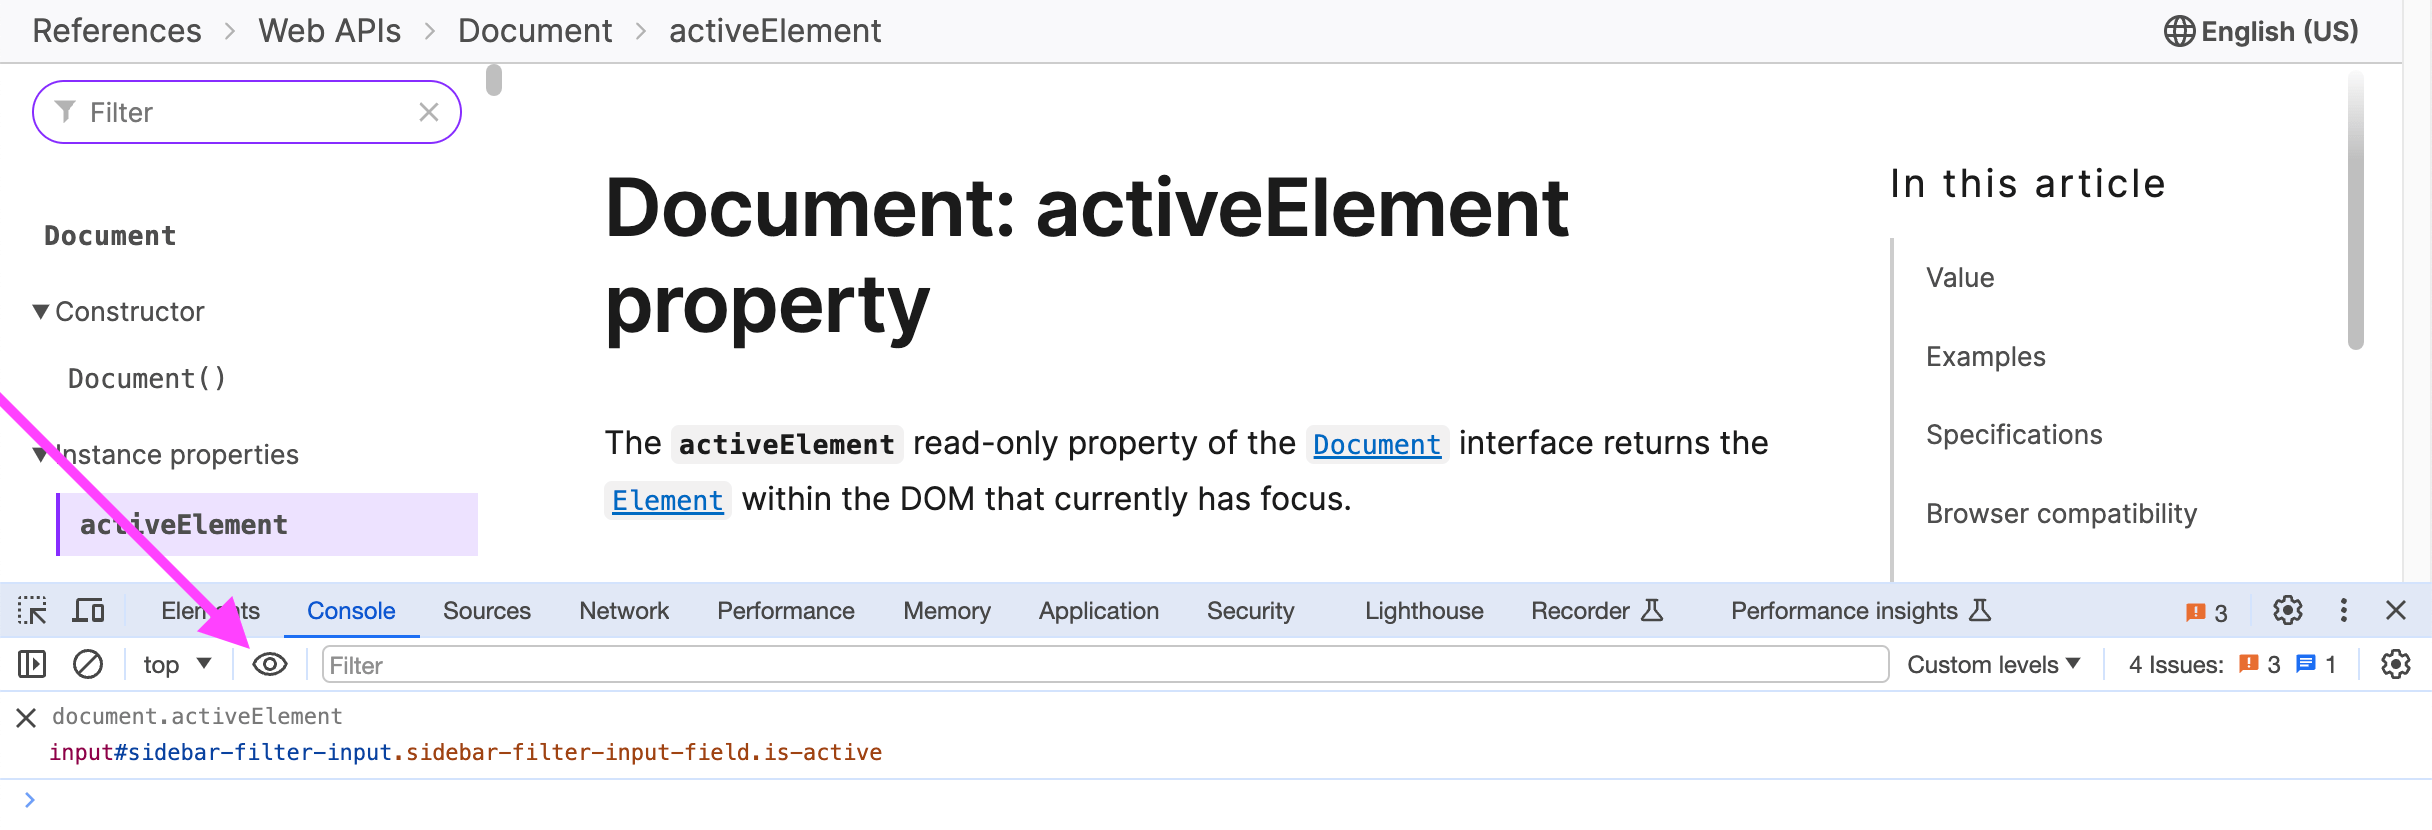
Fig. 17. document.activeElement in Chrome DevTools Live Expression
Further reading:
General documentation:
- Console overview (Chrome);
- Browser Console (Firefox);
- The Console (Safari).
Further tricks:
Copy @ Medium